What a Keurig descaling solution actually does
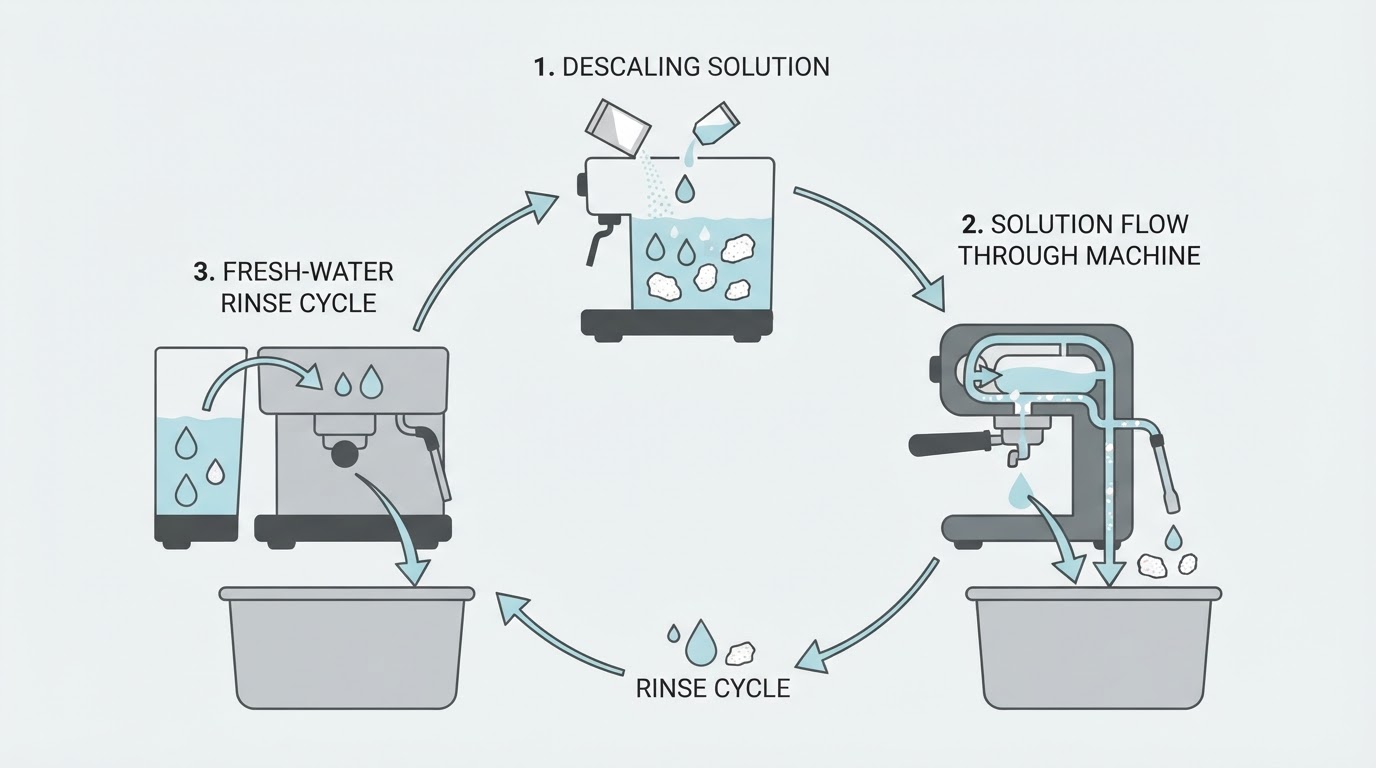
A Keurig descaling solution is a food-safe acid blend — most commonly citric or lactic acid, sometimes with a colour indicator so you can watch the solution move through the machine — that you mix with water and run through the brewer. Its job is narrow and specific: dissolve the calcium and magnesium compounds that hot water drops out of solution, which settle as a hard, chalky layer inside the heating element, pump, tubing, and exit needle.
That makes descaling different from cleaning. Cleaning pods, rinse cycles, and wiping the pod holder remove coffee oils, grounds, and residue — the everyday grime that affects flavour. Descaling removes mineral scale, which is a water problem rather than a coffee problem. If your brewer tastes of stale coffee, clean it. If the brew is weak, slow, or arrives with white specks, you are dealing with scale.
The reason scale matters is thermal. Hard-water deposits form an insulating layer on the metal surfaces that transfer heat. A scaled brewer has to heat longer to reach brewing temperature, which dries out the coffee bed, stretches the brew cycle, and produces a thinner cup. Left long enough, scale narrows the internal passages until flow slows to a trickle or the machine errors out mid-brew.
How the descaling cycle works
The descaling cycle is a controlled acid rinse, not a normal brew. Instead of pulling a single mug of water through a pod, the machine pumps the mixed solution through the same internal path at a slower, staged pace and holds it in short intervals, so the acid gets contact time with the scale rather than passing straight through.
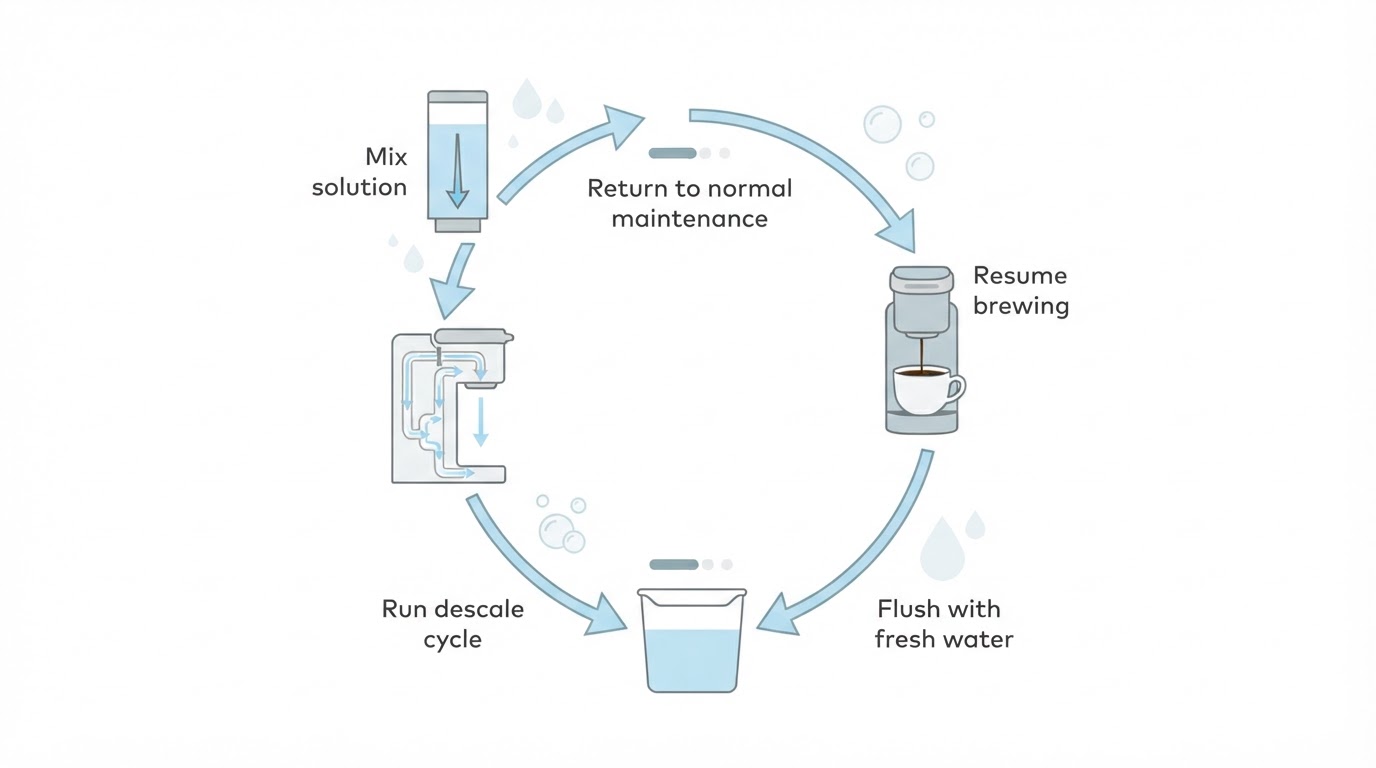
Two things make the cycle effective: heat and dwell time. Warm acid dissolves mineral deposits faster than cold, and the pauses between pump strokes let the solution sit against the surfaces where scale accumulates. That is why descaling is a longer session than a normal brew, and why the machine often looks as though it has stopped when it is really waiting.
Most pod brewers track brew cycles internally and switch on a descale indicator when a threshold is reached; the light is a signal to run the cycle, not a warning that something has failed. The button sequence that starts the cycle varies by model. Some brewers enter a descale mode with a two-button hold, others step through it from a maintenance menu, and some only accept the cycle after the indicator lights. Check your model's manual before you start — the wrong sequence can leave the solution sitting in the reservoir instead of running through the system.
How to run a descale safely, step by step
- Confirm your model's procedure first. Find the descale instructions for your specific brewer before mixing anything. The mechanics are similar across models; the button sequence and indicator behaviour are not.
- Clear the machine. Remove any pod, the pod holder, and the mug tray if the manual tells you to. Empty and rinse the reservoir, then fill it to the level your manual specifies.
- Mix the solution exactly as directed. Use the dilution printed on the descaler label, or the pre-mixed bottle as sold. A stronger mix does not descale faster — it just puts more acid against seals and metal than the manufacturer designed for.
- Put a container large enough for the full reservoir under the spout. A descale cycle can discharge far more liquid than one mug.
- Start the descale cycle using your model's sequence, and leave it alone. Do not interrupt it to brew a cup or top up with water.
- Let the solution work. If your manual allows a dwell period, use it. Do not leave acidic solution sitting in the machine overnight unless the manual explicitly permits it.
- Flush with fresh water. Empty the reservoir, rinse it, refill with clean water, and run the rinse cycles your manual specifies — usually at least one full reservoir, often two. Repeat until the descale indicator clears or the manual's rinse count is complete.
- Finish with a plain water brew. Run a full brew cycle with no pod and taste the water. Any acid or vinegar note means you need another rinse.
- Reassemble and log the date. Write down the date and your water source. It is the fastest way to build an accurate schedule for your machine.
How often to descale a Keurig
Use the brewer's descale indicator as your primary trigger, then adjust with two variables: water hardness and daily brew volume. That combination explains why two identical machines in two different kitchens need very different schedules.
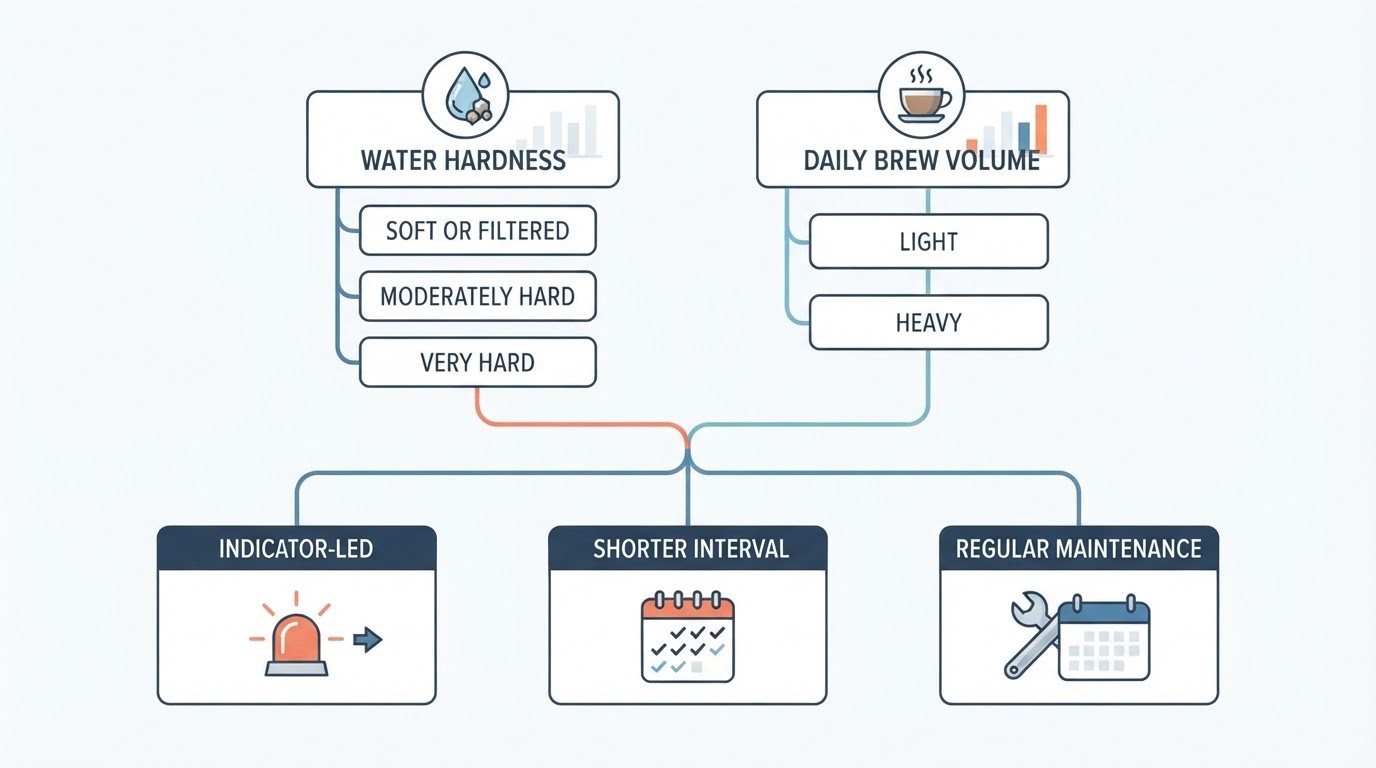
Water hardness | Light use (1–2 cups a day) | Heavy use (4 or more cups a day) |
|---|---|---|
Soft or filtered | Let the indicator lead; months can pass between cycles | Indicator-led, with a check whenever taste changes |
Moderately hard | Indicator-led, with a mid-cycle taste check | Shorten the interval behind the indicator |
Very hard, with visible scale on kettles and taps | Descend before the indicator demands it | Treat descaling as regular maintenance, not a rescue |
A practical way to calibrate your own cadence without guessing:
- If you do not know your water hardness, look at a kettle, showerhead, or tap aerator. Heavy white crust is your answer.
- Record the date each time you descale, and the date the indicator lights next time.
- If taste or brew speed changes before the indicator appears, that is your real interval — shorten the schedule.
- Filtered or bottled water moves you up the table considerably; descaling still matters, but less often.
Vinegar or a dedicated descaling solution?
White vinegar dissolves scale — acetic acid reacts with calcium carbonate the same way a commercial descaler does. The question is what else it does along the way.
| White vinegar | Dedicated descaling solution |
|---|---|---|
Scale removal | Works, especially on light scale, but usually needs longer contact | Formulated to dissolve scale in a defined contact time |
Smell and taste | Pervasive and slow to rinse out; can taint the next few brews | Low when you follow the rinse instructions |
Machine and warranty | Some manuals permit dilution; many pod brewers specify a dedicated descaler instead | The method most manuals describe |
Best for | Occasional descaling on a machine whose manual allows it | Hard-water households, machines under warranty, and anyone who has fought a vinegar aftertaste |
Prefer a dedicated solution when your manual specifies one, when the brewer is under warranty, when the machine has heavy scale, or when you can still taste vinegar after two rinses. Some manufacturers also specify citric acid crystals as the home alternative — if your manual names that, follow it exactly. Never combine vinegar with a commercial descaler, and never use bleach.
Signs your brewer needs descaling
- A descale light or message that appears during normal use.
- Brews that take noticeably longer than they used to.
- Less coffee in the mug than the same pod used to produce.
- A weak, flat, or dry-tasting cup even with a fresh pod.
- Heating sounds that are louder or more frequent than normal.
- White, chalky specks in the mug or crust around the exit needle.
- Repeated errors or pauses mid-brew, especially on a cold machine.
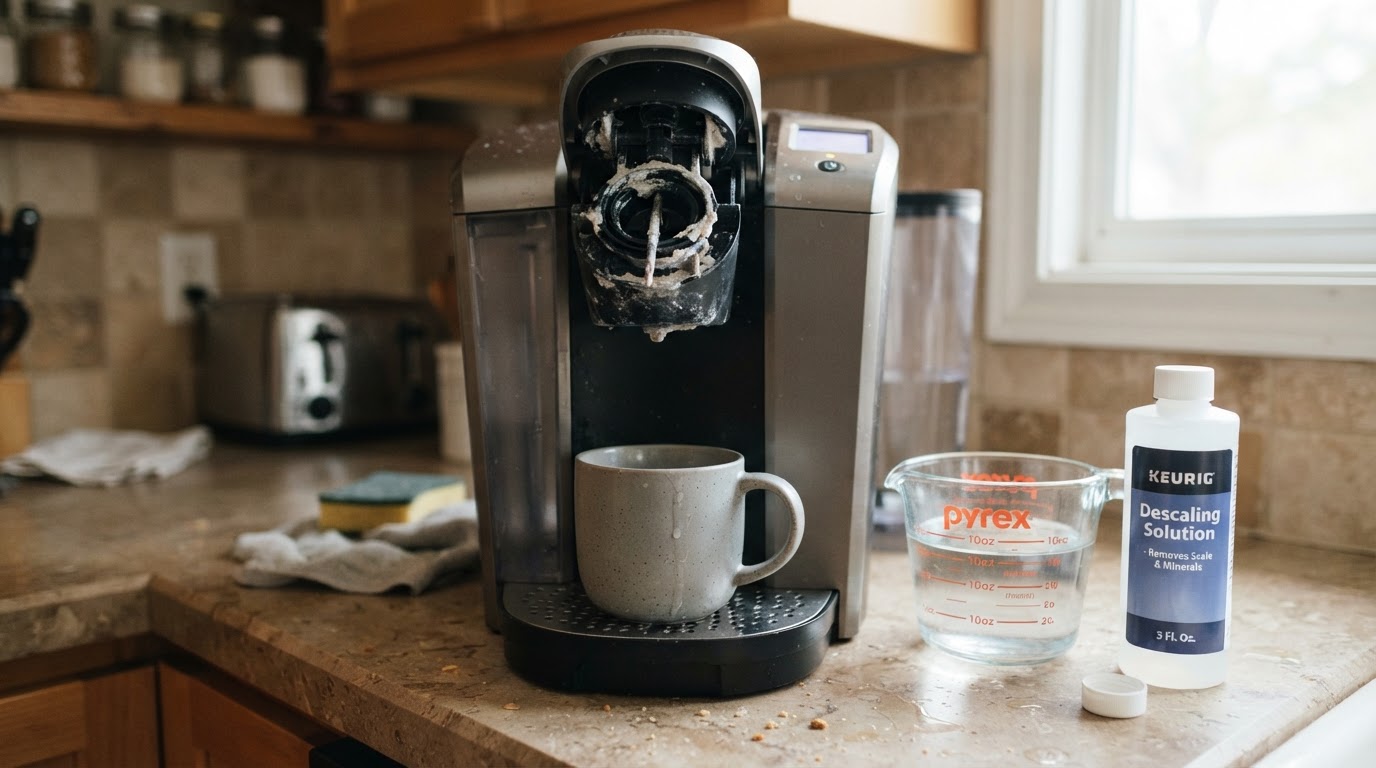
Several of these overlap with a clogged exit needle or a worn pod holder, so check the simple parts first. If the needle is clear and the behaviour persists, scale is the likely cause — and the fix is a full descale cycle, not a second cleaning pod.
Common questions about Keurig descaling
Can I use vinegar instead of a descaling solution?
Only if your manual allows it. It works chemically, but it is harder to rinse, and the manual can settle the question in one sentence. When it specifies a descaler, use the descaler.
Will descaling fix a brewer that has stopped pumping water?
Not always. Descaling restores restricted flow caused by scale, but a failed pump, a blocked needle, or a tripped thermal fuse is a hardware problem. If two rinse cycles after descaling do not restore flow, the machine needs service rather than more acid.
How do I know the rinse is finished?
Taste the water from a plain brew cycle. If it is neutral and odourless, the rinse is done. If you can smell or taste the descaler, run another reservoir of fresh water.
Can I descale with a pod or water filter in place?
No. Remove the pod, and remove a cartridge filter if your model uses one, unless the manual says otherwise. The cycle needs to move through the water path, and a filter would absorb solution instead of passing it through.
Does descaling change the taste of the coffee?
It should improve it. Descaling does not add flavour; it removes the scale that was flattening the brew. If the taste is worse afterwards, the cause is almost always incomplete rinsing.
Aftercare: what to do when the cycle is done
Run one more plain water brew, wipe the exterior and drip tray, and leave the reservoir open to dry. Then write the date somewhere you will see it — a note on the machine or a phone reminder works. Descaling is a maintenance habit, not a one-off repair, and the machines that last longest are usually the ones that were descaled on a schedule instead of after a failure.