Start with the short answer
If your Vertuo tastes dull, runs slowly, or leaves grounds where they do not belong, cleaning usually fixes it faster than buying new pods. A complete care routine has three layers:
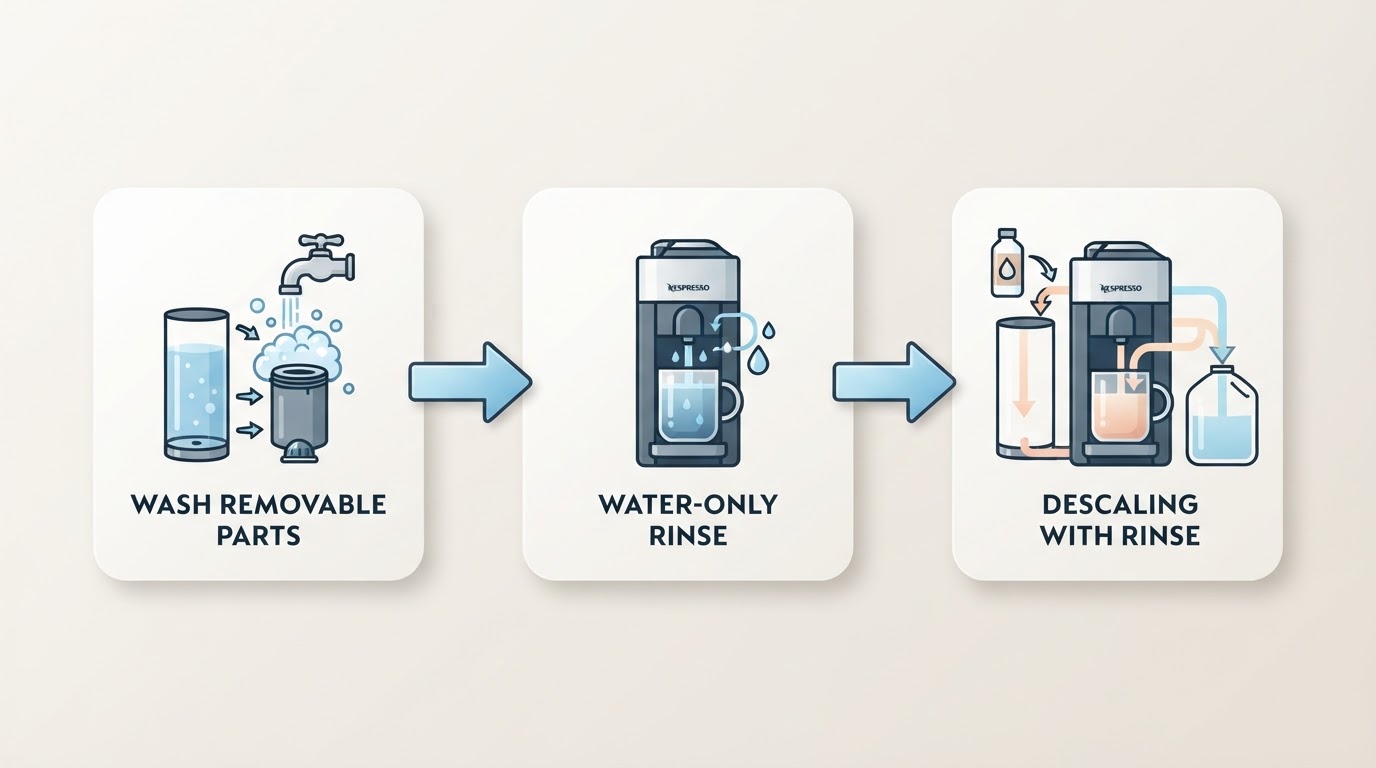
- Daily wipe-down of removable parts that touch water, coffee, and capsules.
- A water-only rinse cycle that flushes the brew path after heavy use or before you leave the machine idle.
- Periodic descaling that dissolves mineral scale inside heaters and lines.
You do not need specialty tools for most of this. You do need the right sequence, mild cleaners, and the habit of checking the same completion signals every time: clear water in the cup, no leftover sludge in the capsule area, and normal flow through a rinse.
Vertuo models share the same care logic even when button timing differs by generation (Plus, Next, Pop, and similar). Treat model-specific button sequences as something to confirm in your machine’s own manual when the lights or menus differ from what you expect. The workflows below stay at the level every owner can verify at the counter.
What you need before you start
Gather these items so you are not stopping mid-clean:
- Fresh drinking water for the tank
- Mild dish soap (unscented if possible)
- A soft sponge or cloth — nothing abrasive
- A clean towel for drying parts
- Access to a sink large enough for the tank and drip tray
- Nespresso descaling solution when it is time to descale (or another descaler labeled safe for Nespresso/Vertuo machines)
Optional but useful:
- A soft bottle brush for tank corners
- A cotton swab for the capsule lip and seal area
- A notebook or phone note with the date of your last descale
Power the machine off and unplug it before you pull apart removable parts. Leave the machine upright. Do not tip it on its side to “drain faster.”
Routine cleaning: removable parts
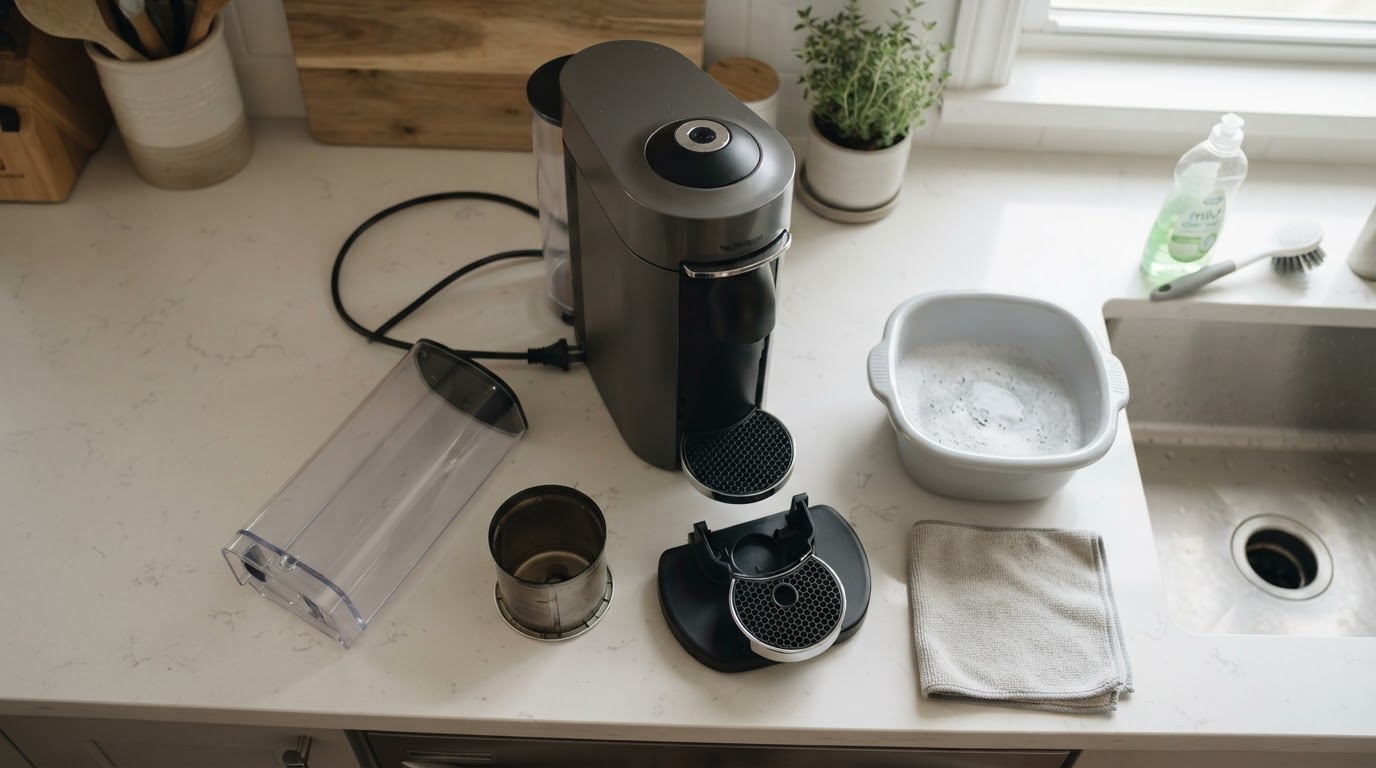
Capsule container and used-pod area
Open the machine head and remove any spent capsule. Empty the used-capsule container into compost or trash. Wash the container with warm soapy water, rinse until the soap film is gone, and dry it before reinstalling. Coffee oils build a film that smells stale even when the rest of the machine looks clean.
Wipe the capsule chamber lip and surrounding surfaces with a damp cloth. If you see brown residue on the seal ring or around the piercing area, use a lightly damp cotton swab. Dry the area so moisture does not sit against plastic overnight.
Cup support and drip tray
Pull the drip tray and cup support forward and empty any standing liquid. Wash both pieces with warm soapy water. Rinse thoroughly. Mineral spots on stainless or plastic trays are normal in hard-water homes; a soft cloth usually removes them. Reassemble only when the parts are dry enough that water is not dripping back into the base.
Water tank
Empty leftover water that has been sitting more than a day. Wash the tank with warm soapy water, paying attention to the corners and the valve area at the base. Rinse until there is no soap taste if you were to fill and pour a sample. Refill with fresh cold water.
If your tank has a filter cartridge, follow the filter’s own replacement schedule. A clogged or overdue filter can mimic “the machine needs descaling” symptoms: slower flow and flat taste. Cleaning the tank does not replace filter care.
Exterior
Wipe the shell with a barely damp cloth. Avoid spraying cleaner directly onto the machine. Keep liquids away from the power connector, vents, and any openings under the head.
Rinse the brew path with a water-only cycle
Removable-part washing does not flush coffee residue inside the brew path. After several days of use — or any time a shot tastes bitter in a way that does not match the pod — run a water-only cleaning cycle:
- Fill the tank with fresh water.
- Make sure no capsule is in the chamber, then close the head.
- Place a large container under the spout.
- Start the machine’s cleaning or rinse procedure for your model. If your manual describes a multi-press button sequence or a menu item for cleaning, use that. If you only have a brew button, run one or more full water dispenses with an empty chamber until the stream runs clear.
- Empty the catch container and drip tray when finished.
Completion check: the water in the cup looks clear, the stream is steady, and the capsule area is dry of old coffee film after a final wipe.
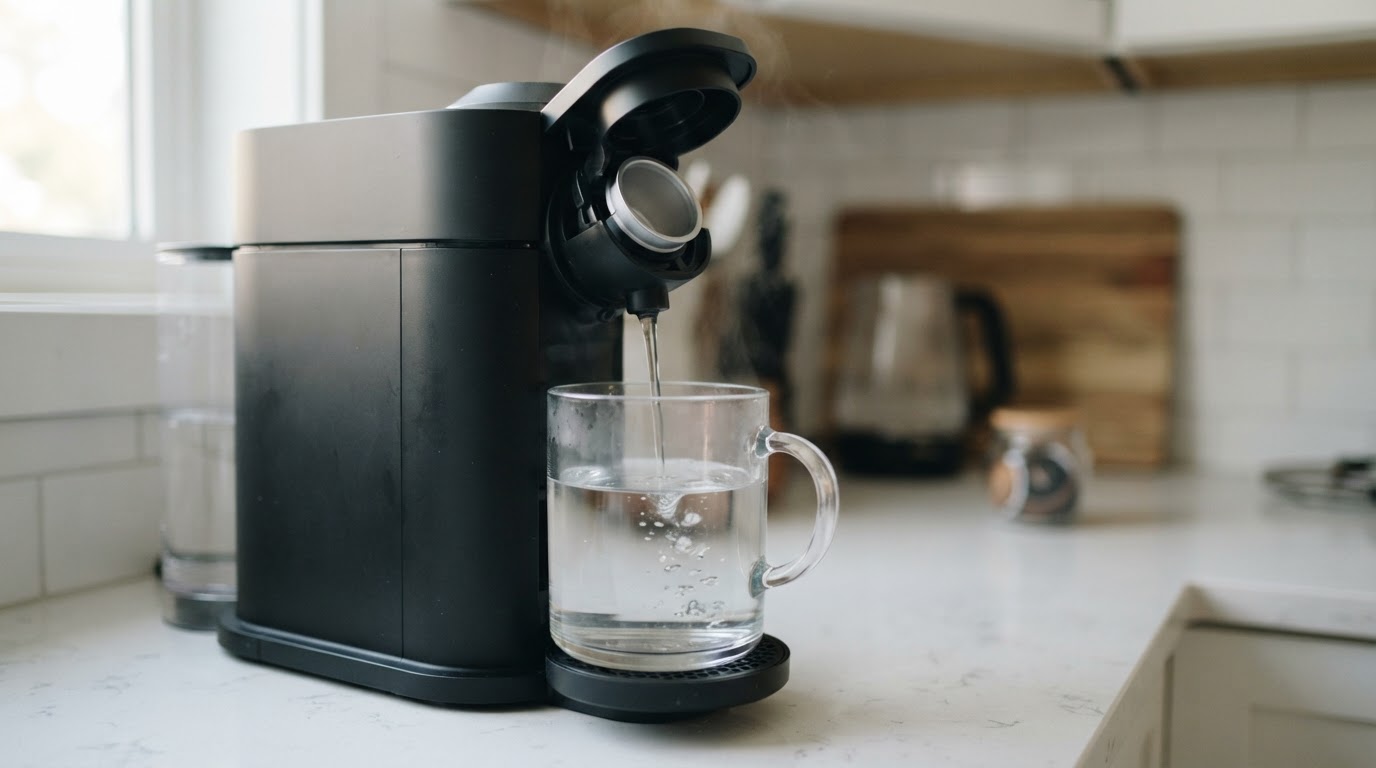
Run this rinse after you clean removable parts, before a multi-day trip, and after you brew particularly oily or flavored pods.
How often to clean
Use frequency as a floor, then tighten it for your water and usage:
Task | Light home use (1–3 drinks/day) | Heavy use or hard water |
|---|---|---|
Empty capsule container | Daily or when full | Every session |
Wash tank / drip tray | 2–3 times per week | Daily |
Wipe capsule area | Several times per week | Daily |
Water-only rinse cycle | Weekly | 2–3 times per week |
Descale | When prompted, or about every 3 months | When prompted, or monthly in very hard water |
These intervals are practical defaults, not a substitute for the alerts your specific machine shows. If the machine flashes a descale warning earlier than you expected, trust the warning and run descaling rather than resetting lights without cleaning.
When and how to descale
Descaling removes mineral scale from heaters and internal lines. Scale is the main reason a previously healthy Vertuo starts brewing thin, slow, or unusually loud.
Signs it is time
- Official descale light, icon, or message on your model
- Noticeably slower flow on the same pod size
- Weaker crema or flat taste after you already cleaned removable parts
- Machine interrupting mid-cycle more often than usual
General descaling workflow
Exact button holds differ by Vertuo generation, but the physical process is consistent:
- Empty the capsule chamber. Never descale with a pod inside.
- Empty and rinse the tank, then add the descaling solution mixed with water in the ratio printed on the descaler packet or bottle. Do not guess concentrations.
- Place a container large enough for a full tank volume under the spout.
- Enter descaling mode using the sequence in your model manual. Stay nearby; the cycle can take roughly 15–20 minutes or longer depending on model and tank size.
- Let the machine run the descaling pass until the tank is effectively empty. Do not unplug mid-cycle unless the manual says to stop for a fault.
- Rinse the tank thoroughly, refill with fresh water only, and run the full rinse pass the manual requires. One quick water brew is not enough; residual descaler tastes harsh and is not meant for drinking.
- Wash the drip tray and cup support again after descaling. Descaler residue collects there.
- Exit descaling mode if your model requires a final button confirmation so normal brew mode returns.
Completion check: fresh-water rinses run clear with no chemical smell, normal brew mode is restored, and a test pod tastes clean rather than salty or sour from leftover solution.
Model family notes without over-fitting the buttons
- Vertuo / Vertuo Plus class: often uses a combination of button holds and lever or head position to enter descaling. Confirm the hold duration in the manual before you start.
- Vertuo Next class: commonly pairs a long button hold with a specific head state. If lights flash in a pattern you do not recognize, stop and check the manual rather than repeating random presses.
- Vertuo Pop and compact models: smaller tanks mean more refill steps during rinse. Budget extra time for the water-only rinse passes after the chemical pass.
If two manuals disagree with a video you watched, the manual for your exact model name wins.
What not to do
Avoid these shortcuts; they cause the most ownership headaches:
- Do not put the machine body in the dishwasher. Removable tank, tray, and capsule container may be hand-wash only even when they look dishwasher-safe.
- Do not use bleach, oven cleaner, or abrasive powders on food-contact parts or seals.
- Do not run vinegar as a casual “natural descale” unless your manual explicitly allows it. Vinegar can leave odor, may not match the machine’s validated chemistry, and can complicate warranty conversations.
- Do not force the head closed on a stuck capsule. Power down, wait, and clear the capsule path carefully.
- Do not ignore slow flow for months. Scale that is easy to remove early becomes a service visit later.
- Do not top off a half-full tank of old descaler and “finish tomorrow.” Finish the cycle the same day and complete the fresh-water rinses.
- Do not store the machine with a full tank of stagnant water for weeks. Empty the tank if you will be away.
Troubleshooting common cleaning-cycle problems
The cleaning or descale cycle will not start
- Confirm the head is fully closed and empty of capsules.
- Confirm the tank is seated and filled to the level the cycle expects.
- Confirm you are actually in cleaning/descale mode, not normal brew mode.
- Power-cycle the machine once, then retry the documented entry sequence.
Lights flash red or the machine stops mid-cycle
- Check for a full drip tray or an unseated tank — both are common interrupt causes.
- Make sure the container under the spout is not so full that water backs up into the spout.
- If the machine was interrupted, empty trays, reseat parts, and restart the cycle from the manual’s recovery steps rather than inventing a new button mash.
Water leaks during cleaning
- Reseat the tank seal and drip tray.
- Confirm you did not overfill the tank above the max line.
- Wipe the capsule seal area; debris on the seal can spray water sideways when the head locks.
Flow is still slow after descaling
- Confirm you completed every fresh-water rinse pass.
- Replace or clean the water filter if your model uses one.
- Run one more water-only rinse after a full tank of fresh water.
- If flow remains poor on every pod size, stop DIY loops and contact Nespresso support or an authorized service path. Internal blockages past user-accessible parts are not worth forcing.
Coffee tastes like descaler or soap
- Rewash the tank and tray with plain water only.
- Run additional water-only cycles until the taste is neutral.
- Avoid scented soaps on the tank going forward.
Capsule will not eject or the head feels gritty
- Power off and clear crushed capsule pieces with care.
- Clean the capsule lip and eject area; dried coffee acts like glue.
- Do not pry with metal tools that can scratch the seal surface.
Ownership cost: clean on a schedule instead of replacing early
Most Vertuo ownership cost sits in pods and descaling solution, not in dramatic repairs — until scale and residue are ignored. A simple cadence protects taste and reduces the chance you replace a machine that only needed maintenance:
- Daily: empty capsules, glance at the drip tray, wipe obvious spills.
- Weekly: wash tank and tray, run a water-only rinse, inspect the capsule seal.
- Seasonal or on alert: full descale plus thorough rinse, then note the date.
If you are deciding between “buy a new machine” and “deep clean this one,” complete a full removable-part clean, a rinse cycle, and a proper descale first. Many “broken” symptoms are maintenance symptoms.
A practical weekly checklist
Print or save this list near the machine:
- Capsule container emptied and washed
- Drip tray emptied and washed
- Water tank washed and refilled with fresh water
- Capsule chamber wiped dry
- Water-only rinse cycle completed (clear stream)
- Descale date checked; schedule next if due
- Exterior wiped; cord and vent areas dry
When every box is true, you have finished cleaning — not merely wiped the outside.
Final takeaway
Knowing how to clean nespresso vertuo is less about a single secret button sequence and more about a repeatable stack: wash what you can remove, flush the brew path with water, descale on evidence or schedule, and refuse harsh shortcuts. Do that consistently and the machine stays closer to the taste and flow it had in the first month of ownership. When a light pattern or head behavior does not match these general steps, pause and follow the manual for your exact Vertuo model before you force another cycle.